

| KEYWORD: | Easson Linear Scale | NAME: | Easson Digital Readout Systems |
|---|---|---|---|
| Meas. Standard: | 0.02 Mm | Meas. Length: | 1300-3000 Mm |
| Display Resolution: | 5 µm | Structure: | Push & Pull System |
| Power: | DC 5V ± 5% | Output Signal: | TTL |


Product Specification
| VA10 | VA11 | VA12 | VA13 | VA20 | VA21 | VA22 | VA23 | ||
| Measuring Standard | Glass Scale - Grating period: 20μm (0.02mm) | ||||||||
| Optical Detecting System | Transmissive Infrared System: wave length 880mm | ||||||||
| Slide Carrier System | Vertical five bearings supporting system | ||||||||
| Resolution | 5μm | 1μm | 5μm | 1μm | 5μm | 1μm | 5μm | 1μm | |
| Measurement Travel | 50-1200mm | Every 50mm per length Specification | Not available | ||||||
| 1300-3000mm | Not available | Every 100mm per length Specification | |||||||
| Accuracy | 50-450mm | ±3μm - ±5μm | -- | ||||||
| 500-800mm | ±10μm | ±5μm | ±10μm | ±5μm | -- | ||||
| 1050-2000mm | ±10μm | ±5μm | ±10μm | ±5μm | -- | ||||
| 1300-3000mm | -- | ±10μm/m | |||||||
| Repeatability | 2μm (0.002mm) | ||||||||
| Hystersis | 3μm (0.003mm) | ||||||||
| Protection | IP 53 | ||||||||
| Power supply | DC 5V ± 5% | ||||||||
| Output Signal | TTL | TTL | 422 | 422 | TTL | TTL | 422 | 422 | |
Installation Dimensions
VA20 / VA21 / VA22 / VA23 Series

Connector interface


Gold-plated pins to avoid poor connection and Anti-corrosion, it has the small PCB inside the connector which allow the VA series Absolute Linear Scale built in the Laser compensation data and directly connect to our LCD DRO, ensure the high measuring accuracy.
DSUB 9PIN

| PIN | TTL | |
| Signal | Cable | |
| 1 | —— | —— |
| 2 | 0V | Orange |
| 3 | —— | —— |
| 4 | GND | GND |
| 5 | —— | —— |
| 6 | A | Yellow |
| 7 | 5V | Red |
| 8 | B | Green |
| 9 | R | Brown |
Product Description
Advanced Optical Measuring System


Grating measurement principle and measurement standard
The measuring standard of grating ruler is glass grating, the glass grating is on the glass with very precise periodic lines. The final measurement accuracy of the grating ruler is determined by a series of quality indicators such as the dimensional accuracy of the periodic grating lines on the grating glass, averageness and transmittance contrast...

Based on the feasibility of cost and economy, the grating glass in the grating scales sold on the market is produced by copying a set of master gratings through a photolithography process. The measurement accuracy of the grating scale(ruler) is completely determined by the accuracy and quality of the master and the perfection of the lithography process.
Easson is one of the few domestic companies that have the ability to produce grating masters on their own. The grating masters used in the production process of grating rulers are completely produced by our company.
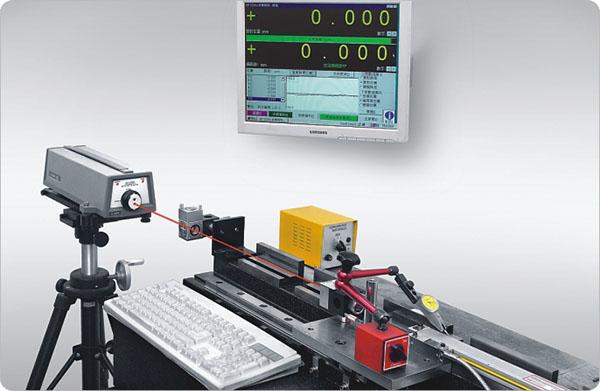
100% Laser calibration

All glass grating transducers are individually inspected and calibrated by our in-house laser interferometer to ensure measuring accuracy comply 100% with the specifications.
Accuracy report
Each linear scale is printed with a QR code, which is convenient for users to view the accuracy report of the factory inspection.


Quality Assurance
Easson is implementing the total quality management system to our plant in China since 1998.
Our quality management system has been assessed and registered by National Quality Assurance Ltd. (NQA) against the provision of ISO9001:2015


